What the Installation Process for Custom Inlay and Herringbone Hardwood Floors in Vail Village Actually Looks Like
Custom hardwood floors are the signature of Vail Village and Beaver Creek’s most distinctive homes. Herringbone patterns, chevron layouts, decorative borders, and inlaid designs transform a floor from a surface into a statement. But the process behind these floors is complex, precise, and nothing like a standard plank installation.
Understanding what custom pattern installation actually involves helps homeowners set realistic expectations for timeline, cost, and the level of craftsmanship required. It also reveals why these floors cannot be rushed and why the installer’s experience matters more here than anywhere else in flooring.
Why Pattern Floors Require a Different Approach
A standard straight-lay hardwood installation follows a simple progression. Boards go down in rows, cut to length at the walls, with consistent spacing and repeating technique. A skilled crew can cover significant square footage per day.
Pattern installations break all of those efficiencies. Every piece must be cut to exact length. Angles must be precise. Layout must be calculated in advance so the pattern centers properly in the room. Mistakes compound visually in ways they never would in a straight-lay floor.
The Design and Layout Phase
Before any wood is cut, the design must be fully resolved on paper.
Room Measurement and Pattern Centering
Herringbone and chevron patterns look wrong if they do not align with the room’s center axis. The installer measures the room precisely and calculates where the pattern should begin so that it terminates symmetrically at the walls. In irregularly shaped rooms, this becomes a complex geometric exercise.
Material Calculation With Waste Allowance
Pattern floors generate significantly more waste than straight-lay installations. Herringbone typically requires 15 to 20 percent additional material. Complex inlays may require even more, depending on how many cuts are needed per section.
Inlay Design and Template Creation
For floors with decorative inlays, borders, or medallions, templates are created at full scale. These templates guide the precise cuts that create the design. Species selection for contrasting elements must be finalized, and all materials must acclimate together.
Acclimation at Altitude
Every hardwood floor in the Vail Valley must acclimate to the home’s environment before installation. For custom pattern floors, this is even more critical.
Why Pattern Floors Are Less Forgiving
In a standard installation, slight expansion or contraction is distributed evenly across long boards. In a herringbone pattern, movement occurs across hundreds of short, precisely angled pieces. Even minor dimensional change can open gaps that are visually amplified by the pattern geometry.
Extended Acclimation Periods
Custom pattern floors often require longer acclimation periods than standard installations. The wood must reach equilibrium with the home’s specific humidity level at altitude before any cutting or installation begins.
The Installation Process
Once materials are acclimated and the layout is calculated, installation proceeds with methodical precision.
Starting the Pattern
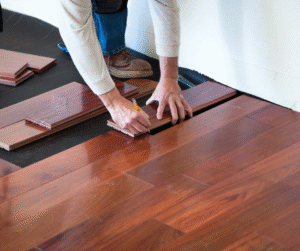
The first few rows of a herringbone or chevron pattern are the most critical. They establish the angle, spacing, and alignment that every subsequent piece must follow. Professional installers use guide lines, laser references, and spacers to ensure the foundation is perfect before building outward.
Glue Down vs Nail Down for Patterns
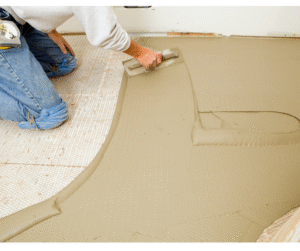
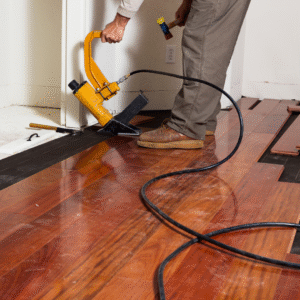
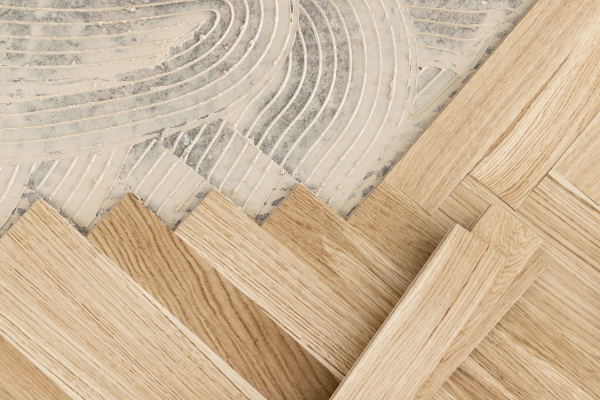
Most pattern installations in Vail Valley use full-spread adhesive rather than nailing. Glue-down provides dimensional stability and prevents the micro-movements that can open joints in short, angled pieces. It also eliminates the risk of nail placement interfering with adjacent pieces in tight patterns.
Cutting Precision and Consistency
Every herringbone piece must be cut to identical length with clean, precise angles. Variation of even 1/32 of an inch compounds across the pattern, creating visible misalignment. This is production work that requires setup, concentration, and quality control at every stage.
Inlay and Border Integration
Where inlays or borders are incorporated, the surrounding field pattern must stop at precise lines. The inlay pieces are fitted individually, often requiring hand-shaping for perfect joints. This is where craftsmanship distinguishes a truly exceptional floor from one that merely approximates the design.
The Finishing Phase
Pattern floors present unique finishing challenges.
Sanding Multi-Directional Grain
In a straight-lay floor, sanding follows the grain direction. In herringbone and chevron, the grain changes direction with every piece. This requires different sanding sequences and finer grits to avoid cross-grain scratches that would be invisible in a standard floor but glaringly obvious in a pattern.
Stain Application on Mixed Grain Angles
Stain absorbs differently when applied across versus along the grain. On pattern floors, this means stain absorption varies from piece to piece. Experienced finishers adjust technique to create uniform color across changing grain directions, a skill that comes only from extensive practice with pattern work.
Finish Coat Protection
The final finish must protect all the intricate joints where pieces meet at angles. These joints are potential entry points for moisture, and a properly applied finish seals them completely. Custom hardwood floor services include finishing protocols designed specifically for the demands of pattern installations.
Timeline and Expectations
Custom herringbone and inlay floors take significantly longer than standard installations. A room that might take two to three days with straight-lay planks could take a week or more with herringbone. Complex inlay work extends the timeline further.
This is not inefficiency. It is the reality of precision work where every piece matters and rushing creates visible consequences.
The Result Is Worth the Process
A custom herringbone or inlay floor is a permanent feature of your home. When installed with proper craftsmanship at altitude, it performs beautifully through decades of mountain living while delivering visual impact that no standard installation can match. The process is demanding, but the result is a floor that belongs in the caliber of home where it is installed.